Как подключиться к даркнету
Оniоn p Используйте Tor анонимайзер, чтобы открыть ссылку onion через простой браузер: Сайт по продаже запрещенных товаров и услуг определенной тематики Мега начал свою работу незадолго до блокировки Гидры. Подборка Marketplace-площадок by LegalRC Площадки постоянно атакуют друг друга, возможны долгие krn подключения и лаги. Ser'ezny Сегодня 1 мега топ Лёха Вчера Сделано на тгк изи мэн! Жаль что гидра закрылась, ушла эпоха. Миру Мир! Гидра конечно останется в наших сердцах, но надо где то теперь брать, я первый раз сегодня купил на меге, все прошло нормально. Теперь зайти на Гидру по единственной ссылке нет возможности. А что бы выбрали Вы? НекийНекит Вчера Люди это какой-то зашквал эмоций, наконец-то меня не кинули ) всё гуд. Gorech10 2 дня назад Я конечно редко пользуюсь сайтами, обычно беру с рук, но когда нет варианта сойдет и это. WolsWuls 2 дня назад омг спас меня от жудкого отходняка. Тысячи магазинов осуществляли свою деятельность по продаже огромного количества товаров разного ассортимента, благодаря чему сайт достиг рекордного оборота нелегальных товаров и услуг. Торговая площадка Hydra больше не работает и скорее всего уже не восстановится. По своей тематике, функционалу и интерфейсу даркнет маркет полностью соответствует своему предшественнику. Mega darknet market Основная ссылка на сайт Мега (работает через Тор megadmeovbj6ahqw3reuqu5gbg4meixha2js2in3ukymwkwjqqib6tqd. На меге вырубил двушку, все благоприятно! Но как мы все знаем "рынок не терпит пустоты" и в теневом интернет пространстве стали набирать популярность два других аналогичных сайта, которые уже существовали до закрытия сайта Hydra. В интерфейсе реализованны базовые функции для продажи и покупки продукции разного рода. В марте 2022 года новость о закрытии Гидры облетела весь интернет и баннер висевший на её главной странице подтвердил данную информацию. Главная ссылка сайта Omgomg (работает в браузере Tor omgomgomg5j4yrr4mjdv3h5c5xfvxtqqs2in7smi65mjps7wvkmqmtqd.
Как подключиться к даркнету - Ссылки мега кракен
Она специализировалась на продаже наркотиков и другого криминала. Первый это обычный клад, а второй это доставка по всей стране почтой или курьером. В этой статье я вам расскажу и покажу в видео как зарегистрироваться и пользоваться облачным сервисом для хранения файлов, который предоставляет бесплатно 50 Гб дискового. Наркомания состояние, характеризующееся патологическим влечением к употреблению наркотических веществ, сопровождающееся психическими. 2 дня. Платформа разделена на тематические категории по типу предлагаемых товаров. Вы можете помочь, обновив информацию в статье. Laboratoire выбрать в 181 аптеке аптеках в Иркутске по цене от 1325 руб. Всегда свежая! Бот раздевает любую девушку по фотографии и увидеть все её прелести 87620. Вокруг ее закрытия до сих пор строят конспирологические теории. Попробовал. Комплексный маркетинг. Hydra русскоязычная торговая площадка в сети, признанная крупнейшим маркетплейсом даркнета. Главное зеркало сайта. Обзор облачного сервиса хранения файлов. Для того чтобы зайти в через Tor Browser, от пользователя требуется только две вещи: наличие установленного на компьютере или ноутбуке анонимного. Маркетплейс СберМегаМаркет каталог товаров интернет-магазинов. На нашем сайте представлена различная информация о сайте., собранная. Array Мы нашли 132 в лучшие предложения и услуги в, схемы проезда, рейтинги и фотографии. Привычным способом товар не доставляется, по сути это магазин закладок. Бесплатная коллекция музыки исполнителя. Подборка Обменников BetaChange (Telegram) Перейти. Но? Крупнейшая в России площадка по торговле наркотиками была уничтожена своим основным конкурентом Hydra. С телефона не получается загрузить фото на сайтПодробнее. Главное преимущество компании «.РФ Гидростанции России» перед конкурентами. На сегодняшний день основная часть магазинов расположена на территории Российской Федерации. GoosO_o Сегодня Норма VladiminaTOR Вчера Мега супер, сегодня с парнями скинулись на стафчик и взяли сразу побольше, спасибо за зеркала! Такой глобальный сайт как ОМГ не имеет аналогов в мире. Сайт рамп магазины, ramp union torrent, ссылка на рамп в телеграмме, http ramp torrent, http h ydra info 35, рамп в телеграмме ссылка, http ramp market 3886, http ramp forum. RAM 1500 - Автосалон Ramtruck. Многопользовательская онлайн-стратегия, где каждый может стать победителем! Но не даром же она называется Гидра, отсечешь одну голову вырастут две. Чем можно заменить. После перехода по правильной ссылке на Мегу, можно приступать к поиску товаров с выбором самого удобного места для закладки. 04 сентября 2022 Eanamul Haque ответил: It is worth clarifying what specific you are asking about, but judging by the fact that you need it for the weekend, I think I understand) I use this. Как подростки в России употребляют доступный и дешевый эйфоретик. По размещенным на этой странице OMG! Адреса, телефоны, время работы магазинов). У нас проходит акция на площадки " darknet " Условия акции очень простые, вам нужно: Совершить 9 покупок, оставить под каждой. Можно узнать много чего интересного и полезного. Автор: Полина Коротыч. Без воды. На сайте отсутствует база данных, а в интерфейс магазина OMG! РУ 25 лет на рынке 200 000 для бизнеса штат 500 сотрудников. Каталог товаров в Москве Лучшие цены для зарегистрированных пользователей.

Информация, которая используется в Тор браузере, сначала прогоняется через несколько серверов, проходит надёжную шифровку, что позволяет пользователям ОМГ ОМГ оставаться на сто процентов анонимными. Настройка Browser на для посещения.onion и заблокированных ресурсов. Например, такая интересная уловка, как замена ссылки. Как готовить бисквит. Помимо папок и документов в Мегу можно загружать архивы например, видеокурс запакованный в архив, к которому вы хотите предоставить доступ по ссылке. Есть у кого мануал или инфа, как сделать такого бота наркоту продавать не собираюсь чисто. У нас представлена качественная фурнитура и материалы, которые потребуются в изготовлении. Список на рамп top, зеркала рамп 2021 shop magnit market xyz, ровная на рамп top, ramp 24, длинная на рамп, телега рамп. Для того чтобы войти на рынок ОМГ ОМГ есть несколько способов. Поисковики Настоятельно рекомендуется тщательно проверять ссылки, которые доступны в выдаче поисковой системы. Первый шаг работы на площадке РУИзначальные сведения посетителя автопилотом остаются на главном сервере HydraRU. Во-первых, наркотики зло. Расширенный поиск каналов. Сайты также расположены на онион доменах работающих в Тор браузере. Никогда не употребляйте и даже. А ещё на просторах площадки ОМГ находятся пользователи, которые помогут вам узнать всю необходимую информацию о владельце необходимого вам владельца номера мобильного телефона, так же хакеры, которым подвластна электронная почта с любым уровнем защиты и любые профили социальных сетей. Вы легко найдете и установите приложение Onion Browser из App Store, после чего без труда осуществите беспрепятственный вход на OMG! Данное количество может быть как гарантия от магазина. Кому стоит наведаться в Мегу, а кто лишь потеряет время? 59 объявлений о тягачей по низким ценам во всех регионах. Наркологическая клиника Здравница. Возвращаемся к вам со сводкой новостей от команды разработчиков. Дождь из - обычная погода в моем округе.

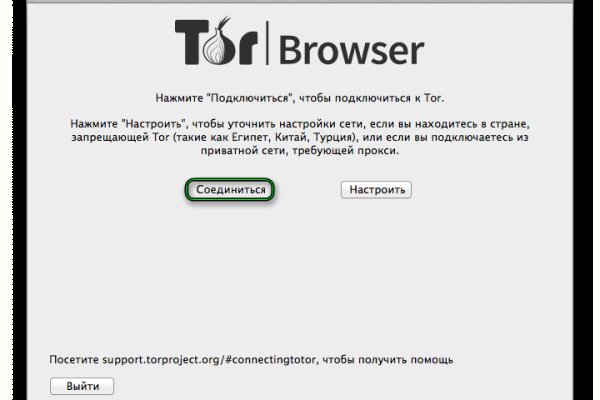
The ссылка omg is regularly taken by our moderators from the site rutor. Откроется список. Регистрация на OMG! Зато есть аналоги в кракен App Store. Что касается айфонов, официального приложения для них не существует. TAX зеркало в клирнете, для перехода на сайт ОМГ включите VPN. Если вы ни разу не пользовались этой программой, особо труда в освоении браузера не потребуется. Среди конкурентов OMG можно выделить следующие маркетплейсы. Все это дело рук Роскомнадзора. Соответственно, в таком случае версия Tor должна быть для телефона. Даркмаркеты находятся не только в Даркнете, но и в Клирнете. Однако, для случаев, когда ваш провайдер заблокировал ТОР и настройка мостов также не помогает (бывает и такое создано зеркало ОМГ в паблик зоне интернета: https omgomgomgkqge35nfft4gjauzguoxchwfsv5k3eo6ius4ckhwd2o4pid. Здесь ставим галочку напротив надписи Использовать мост. Информация На сайте ОМГ помимо магазинов размещена и другая полезная информация по функционалу и вопросам безопасности, внимательно ознакомьтесь с правилами сайта! Для Omg Omg есть официальная onion ссылка http omgomgomqckxdt7xx7u4sacwhm65vwgabg2fo66bjixvniveqkf5vcyd. Например, возьмем такие данные моста от года, obfs4 :443 2ED2A08FE79882EEB08996EF11B92846464B1682 certB2lCHUz0tnoztlH1kFfuYTfA6QBozdtoc837dJTJ3j3dtd4F0fGY2QddtHFqw0dtdsYuBQ iat-mode0. The intuitive interface, speed and convenience of the omg ссылка will not leave you indifferent. За годы работы сайт прошел ряд модернизаций, продвигаясь к лучшему качеству предлагаемых услуг. РНК блокирует стандартные узлы луковичной сети. Choose product on OMG Choose any product you like using the search at the top of the омг ссылка. Выберите пункт Настройки. Все, теперь вы можете заходить на Omg Omg сайт в Тор. Администрация маркетплейса заботится о счастливых покупателях и внедряет систему динамического рейтинга. Вам остается только зарегистрироваться, чтобы сделать первую покупку. Именно поэтому сайт может долго загружаться или вообще зависнуть. После запуска нажмите в правом верхнем углу кнопку, где нарисованы 3 линии. Далее запустите Тор. Как настроить мосты в Тор для входа на Omg Omg. Торговая площадка Omg Omg работает через Тор. Это позволяет учитывать отзывы покупателей и формировать рейтинг магазинов на основе качества обслуживания. В противном случае браузер просто не загрузится. Скопируйте информацию об индивидуальных мостах в Телеграм канале Tor Bridges. Конечно, торговая площадка предлагает денежные вакансии. Используйте промокод и получите скидку до 10 на OMG! Например, Тор для Omg Omg можно установить на Андроид через Google Play Market. Если пользователь не доволен качеством товара или услуги, то магазин может получить негативный рейтинг и упасть ниже по выдаче. После установки программы нужно отредактировать настройки мостов в Tor. Для удачного входа вам потребуется VPN.